 Tellshot
How to use Tellshot
Tellshot lives in your menu bar. This page starts with the 10-second core loop, then walks through every feature — where it is on screen, and how to use it.
The 10-second loop
- ⌥⇧5 Capture — drag over the area you want
- Click the image to drop pin ①, type your comment
- ⌘C Copy — image + formatted fix request together
- Paste into ChatGPT, Claude, an issue, or Slack. Done.
Know the editor
Everything happens in this one window. Six areas to know:
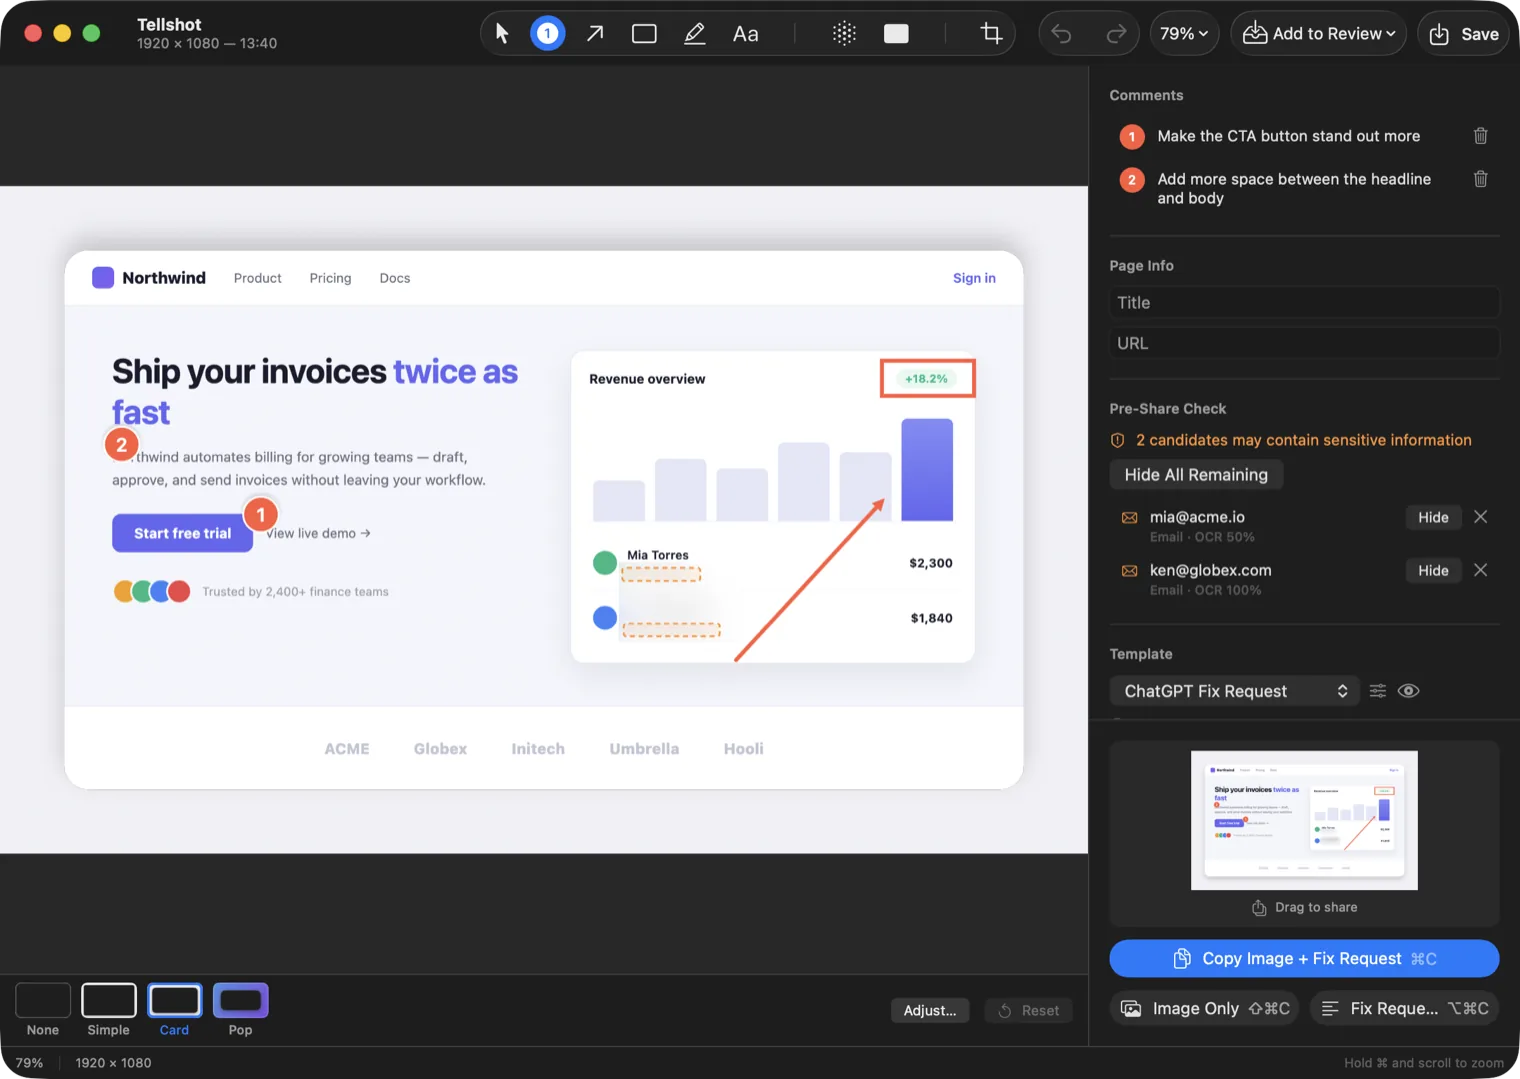
- 1 Toolbar — Select, pin, arrow, box, highlight, text, blur, fill, crop
- 2 Canvas — Your screenshot — click or drag here with a tool selected
- 3 Comments — One row per pin; click a row to edit its comment
- 4 Pre-Share Check — Sensitive text detected in the image, with Hide buttons
- 5 Template & copy — Pick the output format, preview it, and copy
- 6 Style bar — Background frame presets: None / Simple / Card / Pop
Getting started
Tellshot is a menu-bar app: after launch, its icon sits in the top-right of your screen. There's no Dock icon and no window until you capture something.
- Drag Tellshot.app into Applications and launch it.
- Follow the short onboarding and allow Screen Recording when macOS asks — the only permission Tellshot needs, used only at the moment you capture.
- Find the Tellshot icon in the menu bar. Every command starts there — or from a keyboard shortcut.
- See the onboarding again: menu-bar icon → “How to Use…”.
Capture
Three screen modes plus web page capture, each with a global shortcut that works in any app (changeable in Settings → Shortcuts). The editor opens as soon as the capture is taken.
- No shortcut handy? Menu-bar icon → Capture Area / Window / Full Screen / Web Page.
- Web page capture works with Safari, Chrome, Edge, Brave, Arc, and Dia (Firefox: paste the address). Widths: phone 375, tablet 768, desktop 1280 or 1920, your screen width, or custom — phone and tablet use a mobile user agent. https:// pages only. Pages load in a fresh private session on your Mac, so sites that need sign-in appear signed out.
- Annotate an existing image: menu-bar icon → “Import Image…”.
- Prefer a lighter flow? In Settings, switch “After Capture” to a quick overlay with Copy / Save / Edit buttons.
Numbered pins & comments
Pins are the heart of Tellshot: numbered markers, each with a comment. Behind the scenes, Tellshot reads the on-screen text and UI around every pin (OCR + accessibility info), so “① make this button stand out” is copied together with the button's actual label.
- Click the pin tool (①) in the toolbar.
- Click the spot on the image you're talking about — pin ① drops and the comment field focuses automatically.
- Type the comment and press Return.
- Click the next spot for pin ② — numbers increase automatically.
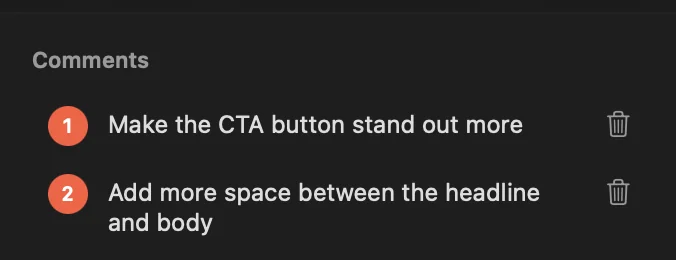
- Edit later: click a comment row to rewrite it; the trash icon deletes the pin.
Arrows, boxes & more
The classics live in the toolbar next to the pin tool. Nothing is burned in while you work — every shape stays selectable and editable until you copy.
- Pick a tool in the toolbar: arrow, box, highlight, or text.
- Drag on the canvas to draw it (for text, click and type).
- Use the bar that appears above the canvas to change color and line width.
- Made a mess? ⌘Z undoes, ⇧⌘Z redoes.

- Zoom: ⌘+ / ⌘− / ⌘0 fits the window, ⌘1 shows 100%.
Privacy masks & Pre-Share Check
Two ways to hide things: draw a mask yourself, or let the Pre-Share Check panel find sensitive text for you — it scans the screenshot for emails, API keys, and similar, and lists every candidate.
- To mask by hand: pick the blur or fill tool and drag over the area.
- To use detection: check the Pre-Share Check panel on the right — each candidate has a Hide button.
- In a hurry? Hide All Remaining masks every unreviewed candidate at once.
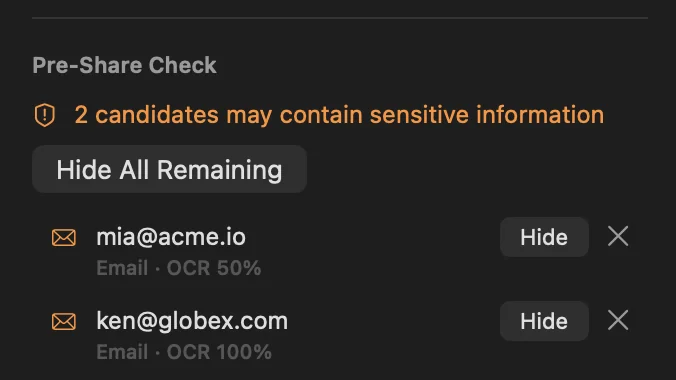
- Safety net: if unreviewed candidates remain when you copy, Tellshot asks before proceeding.
Output templates & copying
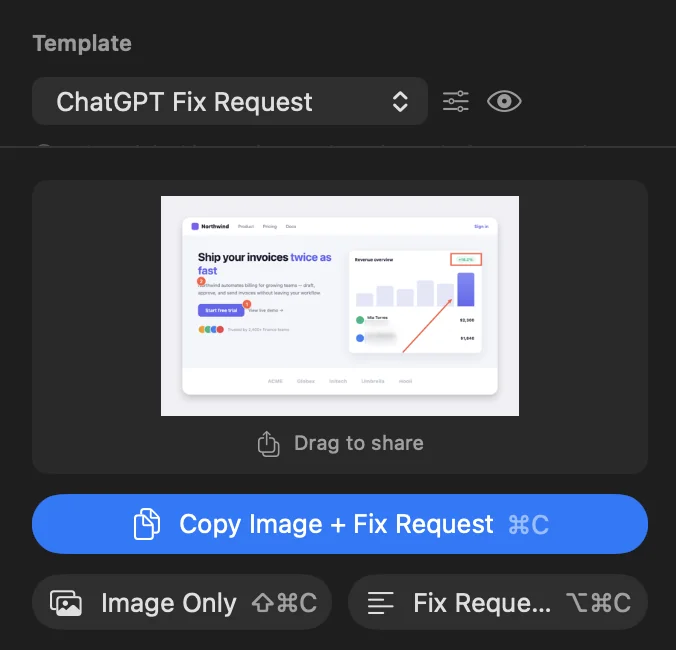
The template decides what text goes with your image. Three are built in — ChatGPT Fix Request, Cursor Code Fix Request, and Share in Slack — and you can build your own with placeholders for page title, URL, and comments.
- Pick a template from the Template menu in the right panel.
- Check the output with the eye icon (preview).
- Click the big blue Copy button — or just press ⌘C.
- Paste in your destination. For apps that can't take image + text at once (like ChatGPT), Tellshot copies in two steps: paste the image, then paste the text.
- Make your own: menu-bar icon → “Manage Templates…”.
Framing styles
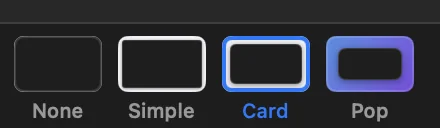
The bar at the bottom wraps your screenshot in a background frame before it's copied or saved.
- Click a preset: None, Simple, Card (default), or Pop.
- Want it different? Adjust… opens controls for background, padding, corner radius, shadow, and output scale.
- Change the default for new captures: Settings → Initial Style.
Review documents
When one screenshot isn't enough, collect several into one fix-request document and hand it over as a file.
-
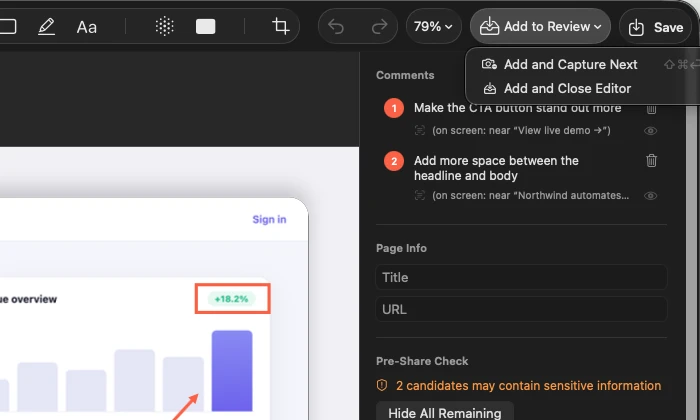
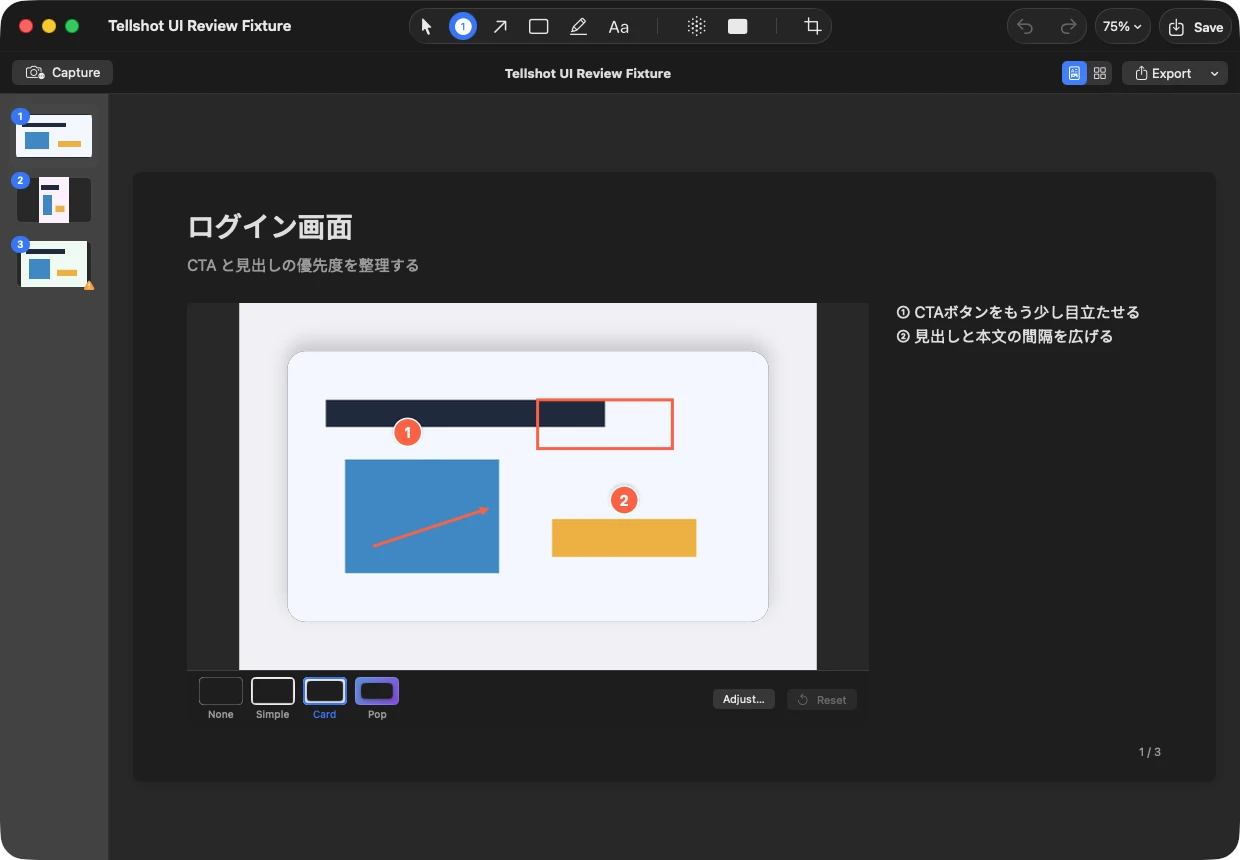
In the editor, open “Add to Review” (top right). “Add and Capture Next” (⇧⌘↩) adds this page and immediately captures the next one — or pick “Add and Close Editor” to stop at one.
-
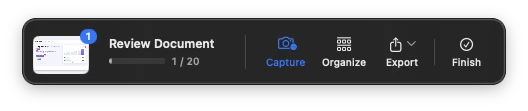
A small floating tray appears and keeps count. Capture adds more pages (up to 20).
-
Organize opens the document: drag pages in the sidebar to reorder, and edit each page's title and summary.
-
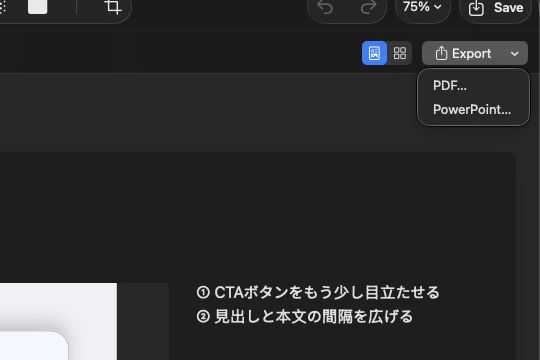
Export produces a PDF or PowerPoint file. Finish saves the document to History.
History
Closing the editor saves the session to History; finished review documents get their own tab there. Reopen anything later and keep editing — pins, masks, and all.
- Menu-bar icon → “Open History…” (or Recent Images for the last five).
- Double-click a session to reopen it in the editor.
- Select a row and press Delete to remove it.
- Heads up: History keeps the original image as captured, before masks are burned in. Turn off “Save original images to History” in Settings → History if you'd rather not.
- Retention: 100 sessions by default (1–1000).
Settings & updates
Settings (menu-bar icon → Settings) covers shortcuts, save location (Pictures/Tellshot by default), capture sound, language (English / 日本語 / system), and the anonymous-crash-report toggle. Updates arrive via the built-in updater — Tellshot checks automatically and always asks before installing.
Free beta · macOS 14+ · Apple silicon & Intel